Download source - 17.33 KB
Download demo - 8.99 KB 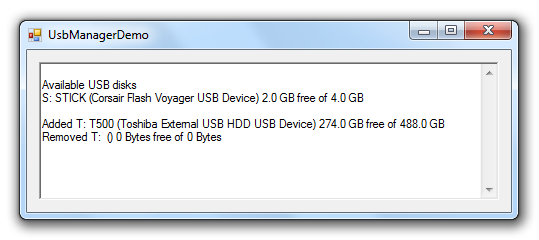
Introduction
This article describes how to use the .NET System.Management WMI (Windows Management Instrumentation) wrappers to enumerate and describe USB disk drives. It also includes a non-Interop solution for detecting drive state changes as they come online or go offline.
Contents
While writing iTuner, I needed to be able to enumerate USB disk drives (MP3 players) and allow the user to select one with which iTuner could synchronize iTunes playlists. In order to select the correct device, the user needs some basic identifying information beyond just drive letter such as volume name, manufacturer's model name, and available disk space. As an added feature, I wanted the UI to update automatically as USB drives come online or go offline. Finally, I wanted to accomplish this through a tidy, simple interface that did not add tremendous complexity to the main application.
Caveat: The UsbManager.GetAvailableDisks method can be run in any application type. However, the StateChanged event will not be fired unless running in the context of a WPF or Windows Forms application. This is because the event handler relies on Windows message processing to intercept these state changes as explained below.
As an application developer and consumer of this API, you first need an instance of the UsbManager class. This class exposes a very simple interface:
 Collapse | Copy Code
class UsbManager : IDisposable
{
    public UsbManager ();
    public event UsbStateChangedEventHandler StateChanged;
    public UsbDiskCollection GetAvailableDisks ();
}

class UsbDiskCollection : ObservableCollection<UsbDisk>
{
    public bool Contains (string name);
    public bool Remove (string name);
}

class UsbDisk
{
    public ulong FreeSpace { get; }
    public string Model { get; }
    public string Name { get; }
    public ulong Size { get; }
    public string Volume { get; }
    public string ToString ();
}
- Instantiate a new
UsbManager using its parameterless constructor.
- Wire up an event handler to the
StateChanged event.
- If desired, call
GetAvailableDisks to retrieve a list of current USB disks.
The UsbDisk class abstracts the information pertaining to a particular USB disk. It includes only the most recognizable fields that a typical end user might use to differentiate drives such as the drive letter (Name), volume name, and manufacturer's model name. It also specifies the available free space and total disk size, both specified in bytes. While other information such as serial numbers, partition or sector data might be of interest to developers, they're quite esoteric to end users.
That's it! Happy coding! OK, keep reading if you want to understand how it's all put together.
Developing this API was first and foremost an exercise in discovering the WMI classes and their relationships. Unfortunately, WMI does not have a single WMI_USBDiskDrive class with all the properties we want. But the information is there. I started by using the WMI Explorer utility from KS-Soft. It's free and available for download on their Web site.
The first WMI class that draws your attention is Win32_DiskDrive. Drives are listed with creative and obvious names like "\\PHYSICALDRIVE0". We can filter these by looking at only those with an InterfaceType property value of "USB". Win32_DiskDrive also specifies the Model and Size of the drive. There are lots of other properties, but none are very interesting in this case. Here's the WMI query that retrieves the DeviceID and Model name for USB drives:
Collapse | Copy Code select DeviceID, Model from Win32_DiskDrive where InterfaceType='USB'
My next stop was the Win32_LogicalDisk class. This gets a bit more interesting right off the bat because instances are listed as drive letters like "C:", "D:", and "S:". We can also fetch the FreeSpace and VolumeName properties. Here's the WMI query:
Collapse | Copy Code select FreeSpace, Size, VolumeName from Win32_LogicalDisk where Name='S:'
We now need a way to associate Win32_DiskDrive and Win32_LogicalDisk so we can marry these bits of information together. You might think there would be some shared field that allows you join the two classes. No such luck. And that's exactly where the Web came to the rescue and I discovered a bit of code tucked away on MSDN that demonstrates how to associate these classes. We can use the associators operator to discover associations between various classes. Given a Win32_DiskDrive instance, we can use its DeviceID property to determine the Win32_DiskPartition instance associated via Win32_DiskDriveToDiskPartition:
Collapse | Copy Code associators of {Win32_DiskDrive.DeviceID='\\PHYSICALDRIVE1'}
where AssocClass = Win32_DiskDriveToDiskPartition
Then using Win32_DiskPartition.DeviceID, we can determine the Win32_LogicalDisk instance associated via Win32_LogicalDiskToPartition:
Collapse | Copy Code associators of {Win32_DiskPartition.DeviceID='Disk #0, Partition #1'}
where AssocClass = Win32_LogicalDiskToPartition
To execute a WMI query, we can use the System.Management.ManagementObjectSearcher class. This class always has the same pattern: search, get, enumerate as shown here:
Collapse | Copy Code ManagementObjectSearcher searcher =
new ManagementObjectSearcher("select * from Win32_DiskDrive");
ManagementObjectCollection items = searcher.Get();
foreach (ManagementObject item in items)
{
}
Given the cascading calls needed to query the four WMI classes, we would end up with a fairly ugly nesting of foreach loops. In order to clean this up and make the logic more obvious, I created a simple extension method for the ManagementObjectSearcher class. This extension adds a First() method to the ManagementObjectSearcher class that invokes its Get method, enumerates the resultant collection and immediately returns the first item in that collection:
Collapse | Copy Code public static ManagementObject First (this ManagementObjectSearcher searcher)
{
ManagementObject result = null;
foreach (ManagementObject item in searcher.Get())
{
result = item;
break;
}
return result;
}
Combine this helper extension with the WMI queries above and we end up with a straightforward code in UsbManager.GetAvailableDisks(). Yes, we still have a nested structure, but testing for null is much more clear than the alternative!
Collapse | Copy Code public UsbDiskCollection GetAvailableDisks ()
{
UsbDiskCollection disks = new UsbDiskCollection();
foreach (ManagementObject drive in
new ManagementObjectSearcher(
"select DeviceID, Model from Win32_DiskDrive " +
"where InterfaceType='USB'").Get())
{
ManagementObject partition = new ManagementObjectSearcher(String.Format(
"associators of {{Win32_DiskDrive.DeviceID='{0}'}} " +
"where AssocClass = Win32_DiskDriveToDiskPartition",
drive["DeviceID"])).First();
if (partition != null)
{
ManagementObject logical = new ManagementObjectSearcher(String.Format(
"associators of {{Win32_DiskPartition.DeviceID='{0}'}} " +
"where AssocClass= Win32_LogicalDiskToPartition",
partition["DeviceID"])).First();
if (logical != null)
{
ManagementObject volume = new ManagementObjectSearcher(String.Format(
"select FreeSpace, Size, VolumeName from Win32_LogicalDisk " +
"where Name='{0}'",
logical["Name"])).First();
UsbDisk disk = new UsbDisk(logical["Name"].ToString());
disk.Model = drive["Model"].ToString();
disk.Volume = volume["VolumeName"].ToString();
disk.FreeSpace = (ulong)volume["FreeSpace"];
disk.Size = (ulong)volume["Size"];
disks.Add(disk);
}
}
}
return disks;
}
Now that we can enumerate the currently available USB disk drives, it would be nice to know when one of these goes offline or a new drive comes online. This is the purpose of the UsbManager.DriverWindow class.
The DriverWindow class extends System.Windows.Forms.NativeWindow and is a private class encapsulated by UsbManager. The WndProc method of NativeWindow provides a convenient location to intercept and process Windows messages. The Windows message we need is WM_DEVICECHANGE and its LParam value must be DBT_DEVTYP_VOLUME. The WParam value is also important and we look for two DBT values (and an optional third).
DBT_DEVICEARRIVAL - broadcast when a device or piece of media has been inserted and becomes available DBT_DEVICEREMOVECOMPLETE - broadcast when a device or piece of media has been physically removed DBT_DEVICEQUERYREMOVE - broadcast to request permission to remove a device or piece of media; we do not process this message but it provides an opportunity to deny removal of a device
DBT_DEVICEARRIVAL and DBT_DEVICEREMOVECOMPLETE both deliver a DEV_BROADCAST_VOLUME struct. This is actually a DEV_BROADCAST_HDR whose dbcv_devicetype is set to DBT_DEVTYP_VOLUME, so we know we can cast the packet to a DEV_BROADCAST_VOLUME.
Collapse | Copy Code [StructLayout(LayoutKind.Sequential)]
public struct DEV_BROADCAST_VOLUME
{
public int dbcv_size; public int dbcv_devicetype; public int dbcv_reserved; public int dbcv_unitmask; public short dbcv_flags; }
The dbcv_unitmask field is a bitmask where each of the first 26 low-order bits correspond to a Windows drive letter. Apparently, it is possible to see a device associated with more than one drive letter but we only care about the first available for our use.
DriverWindow fires its own StateChanged event to signal UsbManager. UsbManager then decides if it needs to retrieve information - which it does for new arrivals - and then fires its own StateChanged event to signal consumers.
The demo app attached to this article shows all the power of UsbManager in just a few lines of code. It first enumerates all existing USB disk drives and displays them in a TextBox. It then wires up a handler to the UsbManager.StateChanged event. This event is defined as follows:
Collapse | Copy Code public event UsbStateChangedEventHandler StateChanged
Take a look at the StateChanged implementation and you'll notice that the add and remove statements have been extended. This allows us to instantiate a DriverWindow instance only when consumers are listening and then dispose it off when all consumers have stopped listening.
Your handler must be declared as a UsbStateChangedEventHandler as follows:
Collapse | Copy Code public delegate void UsbStateChangedEventHandler (UsbStateChangedEventArgs e);
And the UsbStateChangedEventArgs is declared as:
Collapse | Copy Code public class UsbStateChangedEventArgs : EventArgs
{
public UsbDisk Disk;
public UsbStateChange State;
}
- The
State property is an enum specifying one of Added, Removing, or Removed.
- The
Disk property is a UsbDisk instance. If State is Added, then all properties of Disk should be populated. However, if State is Removing or Removed, then only the Name property is populated since we can't detect attributes of a device that no longer exist.
If you found this article helpful and enjoy the iTuner application, please consider donating to support continual improvements of iTuner and, hopefully, more helpful articles. Thanks!
출처 : http://www.codeproject.com/KB/cs/UsbManager.aspx


